The gentle power of yoga for back pain
Back pain can be a real downer, whether it's from sitting at a desk all day, an intense workout, or just the stresses of life. The good news? You don't need expensive treatments or hours at the gym to find relief. Yoga, with its gentle movements and focus on the breath, offers a way to soothe aches and pains. This guide is designed for beginners – no experience needed! We'll look at five simple yoga poses you can do in your living room. These poses gently stretch and strengthen the muscles that support your spine, helping you find comfort and improve flexibility. Get ready to say goodbye to stiffness and hello to a more relaxed you!
Why this workout is perfect for home beginners
This yoga sequence is designed for beginners, focusing on accessible poses and modifications that everyone can do. The beauty of practicing yoga at home is the flexibility. You can practice in your pyjamas, take breaks when needed, and tune into your body's needs. There is no need to worry about keeping up with a class or feeling self-conscious. Each pose includes easy-to-follow instructions, so you can move at your own pace and avoid strain. You can start with just a few minutes each day and gradually increase the time as you feel comfortable. This is about listening to your body and finding what feels good.
- No Equipment Needed: All you need is a comfortable space and a yoga mat (though even a carpeted floor will do!).
- Time-Efficient: These poses can be completed in under 15 minutes, fitting into any schedule.
- Gentle and Safe: The focus is on gentle movements and proper alignment to avoid injury.
Essential moves you'll need: Step-by-step instructions
Here’s your go-to sequence for gentle back pain relief. Remember to listen to your body and modify the poses if needed. Breathe deeply throughout each pose, and focus on relaxing into the stretch. This sequence will help you improve your posture, increase flexibility, and ease tension. Let's get started!
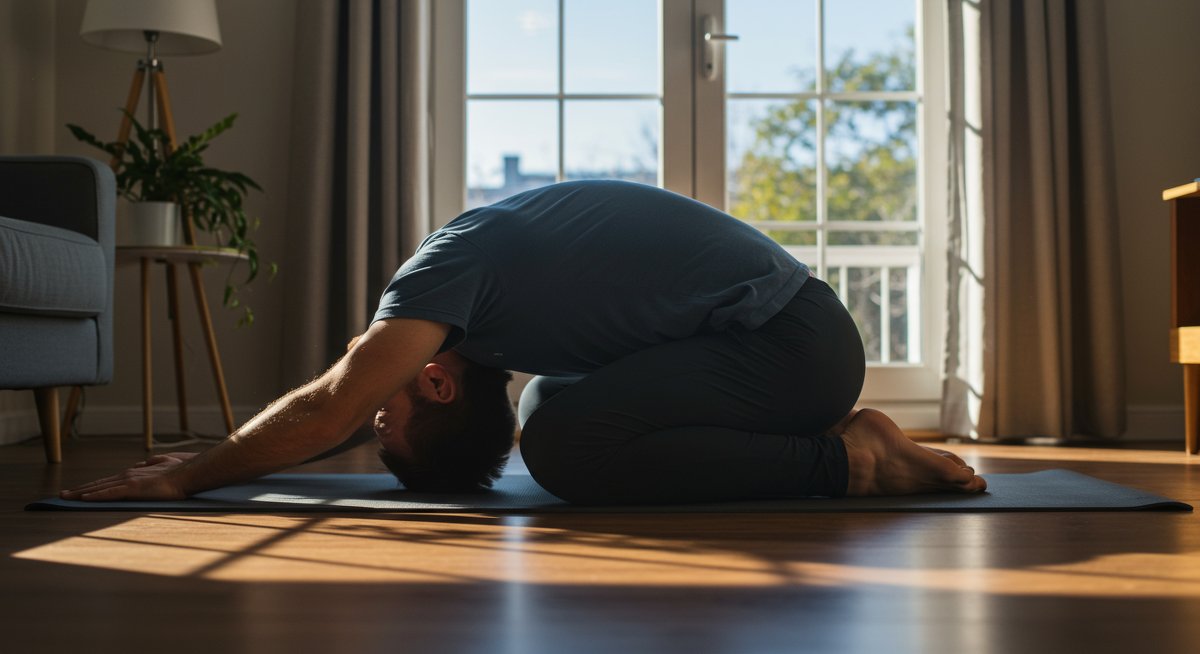
Child's Pose (Balasana):
- Instructions: Begin on your hands and knees. Bring your big toes to touch and spread your knees as wide as is comfortable. Sink your hips back towards your heels, resting your torso between your thighs. Extend your arms forward, resting your forehead on the mat. If your forehead doesn't reach, place a pillow or block underneath it. Hold this pose for 1-3 minutes, focusing on deep, even breaths.
- Benefits: Gently stretches the lower back, hips, and thighs, relieving stress and fatigue. It’s a grounding pose.
- Example: Imagine you've had a long day at work. Settling into Child's Pose allows you to release the tension in your back.
- Common Mistakes: Don’t force your knees too wide if it causes discomfort. The goal is relaxation, not strain.
- Expert Tip: If you have tight hips, placing a pillow or blanket between your thighs and heels can make this pose more comfortable.
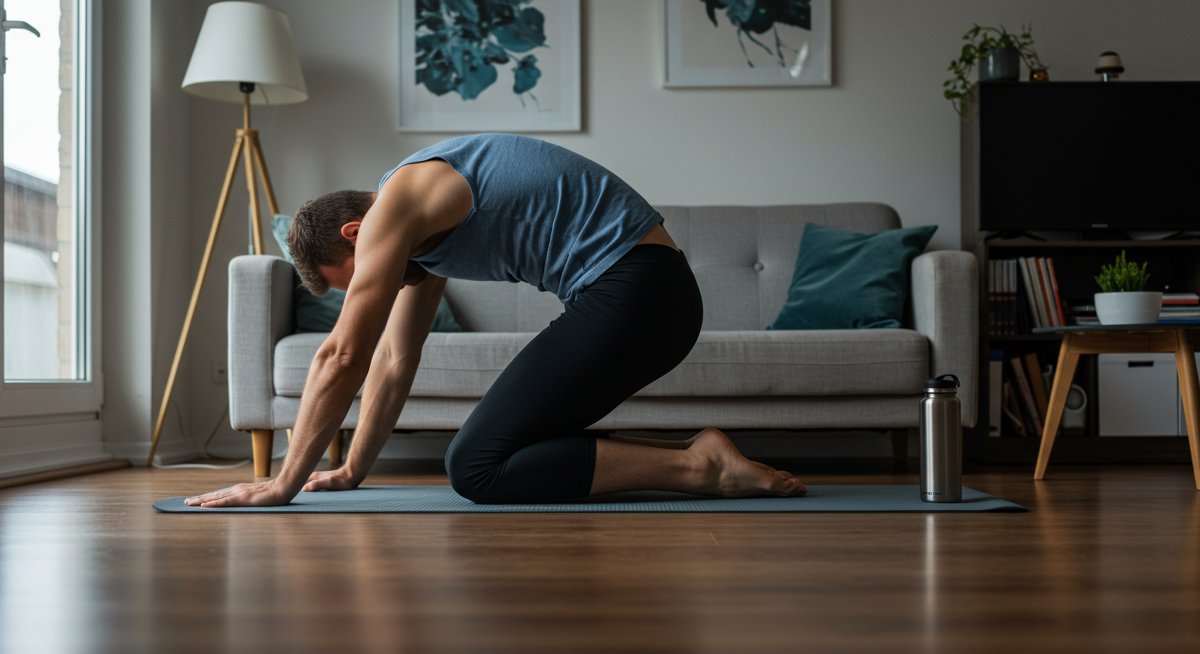
Cat-Cow Pose (Marjaryasana to Bitilasana):
- Instructions: Start on your hands and knees, with your wrists under your shoulders and your knees under your hips. For Cat Pose: Inhale, drop your belly towards the floor, and lift your chest and chin, gazing upwards (Cow Pose). For Cow Pose: Exhale, round your spine towards the ceiling, tucking your chin to your chest, and pressing your hands into the floor (Cat Pose). Continue flowing between these two poses for 1-2 minutes, coordinating your breath with your movements.
- Benefits: Improves spinal flexibility, massages the abdominal organs, and relieves stress.
- Example: Picture yourself as a cat and a cow, flowing between the two poses. With each inhale and exhale, feel your spine opening and lengthening. This is great for desk workers.
- Common Mistakes: Avoid collapsing in your lower back in Cow Pose. Engage your core to support your spine.
- Expert Tip: Focus on feeling each vertebra move as you flow between poses. This mindful movement enhances the benefits.
Thread the Needle Pose (Urdhva Mukha Pasasana):
- Instructions: Start on your hands and knees. Inhale, and extend your right arm towards the ceiling. Exhale, and thread your right arm under your left arm, resting your right shoulder and head on the mat. Your left arm can either stay extended overhead or wrap around your lower back. Hold this pose for 30-60 seconds, breathing deeply. Repeat on the other side.
- Benefits: Stretches the upper back, shoulders, and neck, relieving tension. Helps to open up the chest and improve circulation.
- Example: Imagine twisting your body, like wringing out a towel. This pose helps release knots from sitting at a computer for long hours.
- Common Mistakes: Avoid collapsing on your shoulder. Keep your core engaged and your spine aligned.
- Expert Tip: If you have shoulder issues, keep your top arm extended instead of wrapping it around your back. This is an awesome pose for desk workers.
Sphinx Pose (Salamba Bhujangasana):
- Instructions: Lie on your belly with your legs extended and your forearms on the floor, elbows under your shoulders. Press your forearms into the floor and lift your chest, keeping your lower body relaxed. Gaze forward and hold this pose for 30-60 seconds, breathing deeply.
- Benefits: Gently strengthens the spine and opens the chest, improving posture and relieving lower back pain. It's one of the easiest poses to do.
- Example: Think of yourself as a majestic sphinx. Feel the gentle stretch in your lower back as you lift your chest.
- Common Mistakes: Avoid pushing too hard, which can strain your lower back. Keep your shoulders relaxed and down.
- Expert Tip: If this pose is too intense, keep your elbows closer to your body.
Supine Twist (Supta Matsyendrasana):
- Instructions: Lie on your back with your knees bent and feet flat on the floor. Extend your arms out to the sides in a "T" shape. Gently drop both knees to the right side, keeping your shoulders flat on the floor. Turn your head to the left. Hold this pose for 30-60 seconds, breathing deeply. Repeat on the other side.
- Benefits: Stretches the spine, hips, and shoulders, and massages the abdominal organs. It’s a way to release tension.
- Example: Visualize your spine as a river being twisted. With each exhale, release tension. This can be done right before bed.
- Common Mistakes: Avoid lifting your shoulders off the floor. Keep them grounded to maximize the twist.
- Expert Tip: If you have tight hamstrings, keep your knees bent more and bring them closer to your chest.
Tips for success: Making the most of your yoga practice
Yoga is a personal journey, and there’s no one-size-fits-all approach. Here are some tips to make your home yoga practice as effective and enjoyable as possible.
- Find a Quiet Space: Choose a quiet, comfortable area in your home where you can practice without distractions.
- Wear Comfortable Clothing: Opt for loose, breathable clothing that allows for freedom of movement.
- Listen to Your Body: Never push yourself beyond your limits. Modify poses as needed and take breaks when you need them.
- Focus on Your Breath: The breath is the anchor in yoga. Concentrate on slow, deep inhales and exhales throughout each pose.
- Consistency is Key: Try to practice these poses regularly, even if it's just for a few minutes each day, to experience the full benefits.
- Start Slow: Don't feel like you need to hold poses for long periods. Begin with shorter holds and gradually increase the duration as your body becomes more comfortable.
Benefits and how it helps your goals
The benefits of practicing yoga for back pain relief extend beyond the physical. Regular yoga practice can:
- Reduce Pain and Inflammation: Gentle stretching and movement can help to decrease inflammation and relieve pain.
- Improve Flexibility and Mobility: Yoga poses increase the range of motion in your spine and joints, making everyday movements easier.
- Enhance Posture: Many yoga poses strengthen the muscles that support your spine, leading to better posture.
- Reduce Stress and Anxiety: Yoga incorporates mindfulness and deep breathing techniques, which can help to calm the mind and reduce stress, another cause of back pain.
- Boost Energy Levels: Despite being gentle, yoga can invigorate and energize the body.
Yoga is a tool for addressing back pain and improving your overall well-being. Remember, even a few minutes a day can make a big difference in the long run.
How to fit it into your busy schedule
One of the hurdles to starting a new exercise routine is finding the time. But with these simple yoga poses, fitting in a quick session is easier than you think. Here are some suggestions to integrate yoga into your daily life.
- Morning Boost: Start your day with a 10-minute yoga session to energize your body and mind.
- Mid-Day Break: Take a break from work to do a few poses, especially if you work at a desk.
- Evening Wind-Down: Use yoga to relax and unwind before bed.
- Travel Friendly: Yoga can be done anywhere, making it perfect for travel.
Quick warm-up and cool-down
Before you dive into the poses, take a few moments to warm up. This will prepare your body for the stretches. Afterwards, cool down with some gentle stretches. Here are a few examples:
- Warm-up: Gentle neck rolls, shoulder rolls, and arm circles.
- Cool-down: Hold each stretch for 30 seconds. Gently stretch your neck to each side.
Next steps in your home fitness journey
Now that you've learned a simple yoga sequence for back pain relief, it's time to take the next step! Here’s how you can continue your journey:
- Explore Additional Poses: Research other yoga poses that target specific areas of your back.
- Find a Routine: Create a consistent yoga routine that fits your schedule.
- Use Guided Sessions: Check out apps or online videos for guided yoga sessions.
- Listen to Your Body: Pay attention to how your body feels and adjust your practice accordingly.
If you’re looking for a great app to enhance your yoga practice, I recommend the Nike Training Club App, which offers a range of yoga classes, including beginner-friendly options (Nike Training Club App).
Yoga offers a solution for managing back pain. It empowers you to take control of your well-being from the comfort of your own home. And the best part? You can do it on your own terms.
If you're on this journey too, I’d love to hear how it goes for you. Let me know in the comments below. Here's to a pain-free and flexible future!