Mastering Key Techniques for This Workout
Are you feeling the after-effects of a tough workout or perhaps the stiffness from sitting at a desk all day? Foam rolling offers a simple, yet effective, solution for muscle recovery and injury prevention. This guide provides five essential foam rolling techniques that you can easily incorporate into your home fitness routine. These techniques are designed for those at an intermediate fitness level, helping you to deepen your understanding of muscle recovery and enhance your overall well-being.
Foam rolling, also known as self-myofascial release, involves applying pressure to muscle tissue to release knots, reduce inflammation, and improve flexibility. It's a tool for anyone looking to boost their recovery, prevent injuries, and enhance their workout performance.
Why Foam Rolling Is Essential for Home Workouts
Foam rolling is a game-changer for anyone committed to regular home workouts. It's not just about feeling good; it's about optimizing your body's ability to perform. By using a foam roller, you can:
- Improve Muscle Recovery: After a workout, muscles can become tight and sore. Foam rolling helps increase blood flow to these areas, delivering nutrients and speeding up the healing process.
- Enhance Flexibility: Regular foam rolling can increase your range of motion, making your workouts more effective and reducing the risk of injuries.
- Prevent Injuries: By addressing muscle imbalances and tightness, you can significantly lower your risk of strains and sprains.
- Reduce Pain: Foam rolling can help alleviate pain associated with delayed onset muscle soreness (DOMS) and chronic tension.
Example 1: Post-Workout Recovery
Imagine you've just completed a challenging leg workout at home. Your quads and hamstrings are sore. Instead of letting the soreness set in, grab your foam roller. Spend 60-90 seconds rolling each muscle group. You'll notice a reduction in soreness the next day, allowing you to get back to your workouts sooner. This proactive approach keeps you consistent with your fitness goals.
Example 2: Addressing Desk Job Stiffness
If you spend most of your day sitting at a desk, your hip flexors and upper back can become tight. Incorporate foam rolling into your daily routine to combat this. Spend a few minutes rolling out your hip flexors, thoracic spine, and lats. You will feel more open and relaxed, helping you maintain better posture and reduce the risk of back pain.
Example 3: Injury Prevention Focus
Regular foam rolling can address muscle imbalances, like tight hamstrings or weak glutes, which can increase injury risk. If you notice any areas that feel particularly tight or that have given you trouble in the past, focus on those areas during your foam rolling sessions. This preventative approach helps you maintain a consistent workout schedule.
Advanced Variations and Progressions
Foam rolling isn't just about lying on a roller and hoping for the best. Mastering the techniques involves understanding how to target specific muscle groups, control the pressure, and integrate it into your workout routine. Here are some advanced strategies:
- Targeting Specific Trigger Points: When you find a tender spot (a trigger point), pause on it for 20-30 seconds. This can help release the tension and improve blood flow.
- Controlled Breathing: Focus on deep, diaphragmatic breathing while rolling. This helps relax your nervous system and enhance the effectiveness of the technique.
- Combining with Stretching: After foam rolling a muscle group, follow it up with static stretches. This combination can further improve flexibility and range of motion.
Expert Tip: Experiment with different types of foam rollers. A smooth roller is good for beginners, while a textured roller can provide a deeper massage. Consider a roller with varying densities to target different muscle groups and adjust pressure levels.
Step-by-Step Instructions (with pro tips)
Here are five essential foam rolling techniques, each designed to target specific muscle groups and address common areas of tension:
1. Quadriceps
- Setup: Lie face down with the foam roller under your thighs. Prop yourself up on your forearms.
- Technique: Slowly roll from your hip flexors to just above your knees. Focus on the front of your thighs. If you find a tender spot, pause and hold for 20-30 seconds.
- Pro Tip: To target the outer quads (vastus lateralis), slightly rotate your leg outwards. Avoid rolling over the knee directly.
Example: Start by lying face down on a foam roller, positioning it beneath your thighs. Slowly roll up and down, focusing on the area between your hip and knee. If you encounter a tight spot, pause and maintain the pressure for about 20-30 seconds, allowing the muscle to release.
2. Hamstrings
- Setup: Sit on the floor with your legs extended. Place the foam roller under your hamstrings. Support yourself with your hands behind you.
- Technique: Roll from your glutes to just above your knees. Vary the angle of your feet to target different areas of your hamstrings.
- Pro Tip: Keep your core engaged to avoid arching your back. If you experience sharp pain, reduce the pressure.
Example: Position the roller under your hamstrings, starting just below your glutes and rolling down towards your knees. If you feel a tight spot, pause and hold for about 20-30 seconds to release the tension. You can also modify the angle of your feet to target different parts of your hamstrings. This will improve your overall flexibility.
3. Calves
- Setup: Sit on the floor with your legs extended. Place the foam roller under your calves. Support yourself with your hands behind you.
- Technique: Roll from just below your knee to your ankle. Vary the angle of your feet to target the inner and outer calf muscles.
- Pro Tip: Cross one leg over the other to increase the pressure on one calf. Be mindful of the Achilles tendon.
Example: Place the foam roller beneath your calves. Support your upper body with your hands, and slowly roll up and down, from just below your knee down to your ankle. For added intensity, you can cross one leg over the other, which will increase the pressure on the lower calf. This technique is beneficial for anyone with tight calves.
4. Thoracic Spine
- Setup: Lie on your back with the foam roller under your upper back. Bend your knees and place your feet flat on the floor.
- Technique: Gently roll up and down, from the middle of your back to the base of your neck. Avoid rolling your lower back.
- Pro Tip: Place your hands behind your head for support. Use a small movement to avoid overextension of your spine.
Example: Position the foam roller under your upper back, between your shoulder blades. With your knees bent, gently roll up and down, focusing on the area between the middle and base of your neck. This is great for releasing tension from desk work.
5. Lats (Latissimus Dorsi)
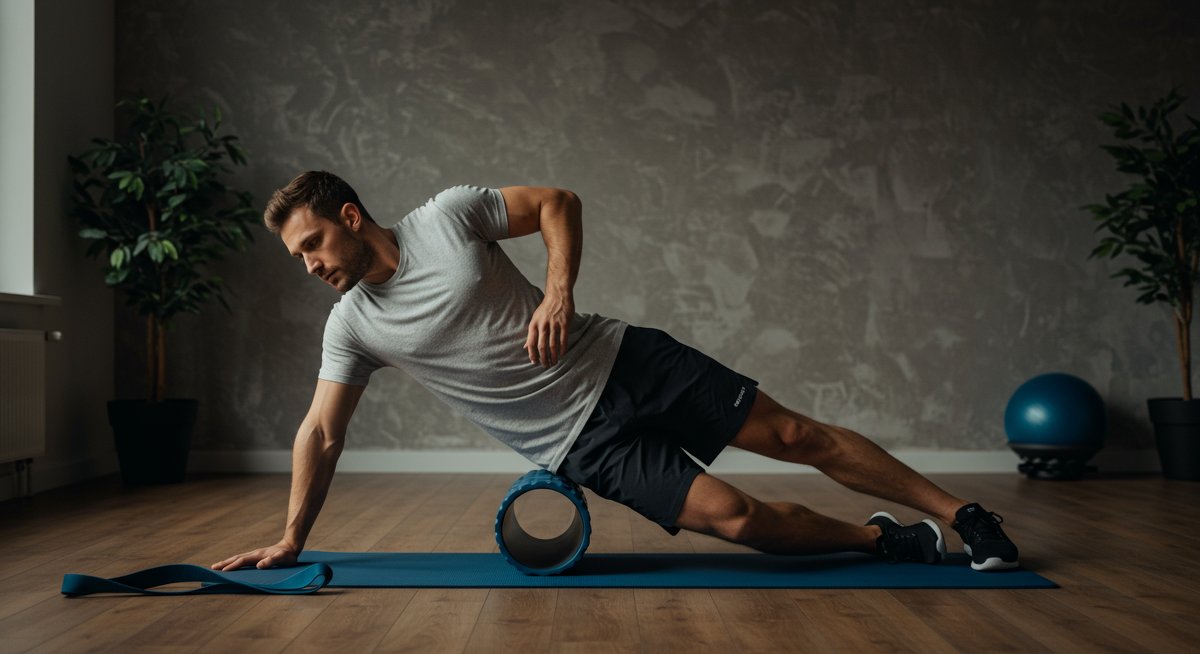
- Setup: Lie on your side with the foam roller under your armpit. Extend your arm overhead for extra reach.
- Technique: Roll from your armpit down to the side of your rib cage. Adjust your angle to target different areas.
- Pro Tip: This can be quite tender. Adjust the pressure by adjusting the weight you put on the roller.
Example: Lie on your side and position the roller under your armpit, between your shoulder blade and your ribs. Roll slowly, adjusting your position to target different points. Use your bottom arm to support your head and maintain balance, focusing on the space between your ribs and shoulder blades for complete release.
Maximizing Your Results at Home
To get the most out of your foam rolling sessions, consider these strategies:
- Consistency is Key: Aim to foam roll at least 2-3 times per week. Regular practice will yield the best results.
- Listen to Your Body: If you feel sharp pain, stop and reduce the pressure. Mild discomfort is normal, but you should not push through intense pain.
- Combine with Other Techniques: Foam rolling works well in conjunction with stretching, yoga, and other recovery methods.
- Warm-up and Cool-down: Use foam rolling as part of your pre-workout warm-up and post-workout cool-down.
Advanced Training Principles
- Mind-Muscle Connection: Focus on the muscle group you are rolling. This enhances the mind-body connection and boosts effectiveness.
- Controlled Movements: Roll slowly and deliberately, paying attention to any tight spots.
- Breathing: Deep, controlled breathing helps to relax the muscles and increases the effectiveness of the technique.
Integrating with Your Existing Routine
Integrating foam rolling into your existing home workout routine is simple. Consider these options:
- Pre-Workout: Use foam rolling to warm up your muscles before your workout. This can improve flexibility and reduce the risk of injury.
- Post-Workout: Incorporate foam rolling into your cool-down routine to aid muscle recovery and reduce soreness.
- Daily Routine: If you spend a lot of time sitting, incorporate foam rolling into your daily routine to alleviate tension and improve posture.
Example: Begin with a 5-10 minute warm-up, which might include light cardio and dynamic stretching. Follow this with 5-10 minutes of foam rolling, focusing on the muscle groups you'll be working during your workout. After your workout, cool down with 5-10 minutes of static stretching and foam rolling to boost your recovery. You can foam roll before and after your workout sessions and incorporate these practices into your daily or weekly schedule.
Pushing Your Limits Safely
While foam rolling is generally safe, there are a few things to keep in mind to ensure you are doing it safely:
- Avoid rolling over joints directly. Focus on the muscle bellies, not the joints themselves.
- Don't roll over injured areas. If you have any injuries, consult with a healthcare professional before foam rolling.
- Stop if you feel sharp pain. Reduce the pressure or stop rolling if you experience sharp pain.
Expert-Level Home Fitness Insights
- Vary Your Routine: Change up your foam rolling routine regularly to target different muscle groups and prevent plateaus.
- Use Different Rollers: Experiment with rollers of different densities and textures to find what works best for you.
- Consult Professionals: If you have persistent pain or injuries, consult a physical therapist or other healthcare professional.
Next Steps in Your Home Fitness Journey
Now that you understand the basics of foam rolling, it's time to make it a regular part of your home fitness routine. Start by incorporating the five techniques outlined in this guide. Over time, adjust and experiment to find what works best for your body and your goals. Consider the following steps:
- Start Today: Don't wait to start. Begin incorporating foam rolling into your routine immediately. Even a few minutes a day can make a big difference.
- Track Your Progress: Keep track of how you feel before and after foam rolling sessions. This will help you identify which techniques are most effective for you.
- Stay Consistent: Make foam rolling a habit. Consistency is key to seeing results.
- Explore Advanced Techniques: As you become more comfortable, explore advanced foam rolling techniques and variations.
- Consult Professionals: If you experience persistent pain or have any questions, don't hesitate to consult a healthcare professional.
By integrating foam rolling into your routine, you'll be well on your way to improved muscle recovery, reduced pain, and enhanced workout performance, all from the comfort of your own home.